Sunday, November 10, 2013
Oreos
I was something of an Oreo hound in my teenage years. At my best friend Mia's house there was always a large plastic tub filled with them that I exclusively commandeered every time I went over. Once, when Mia's mom found it necessary to ground me, my punishment was, among other things, no more Oreos. The horror!
Imagine my delight when I came across this recipe for homemade Oreos in Thomas Keller's Bouchon Bakery. I didn't know exactly where I'd be able to come across the highly alkalized cocoa powder necessary to make them until my friend Katrina asked me if I'd heard of a spice shop in Austin that sold the stuff. Too impatient to wait until I returned to Texas, I tracked down a spice place in Portland that carried the beautiful soft black cocoa powder I was looking for. The fact that the people who worked there (at Savory's Spice Shop) were just about the nicest individuals ever was a little added bonus.
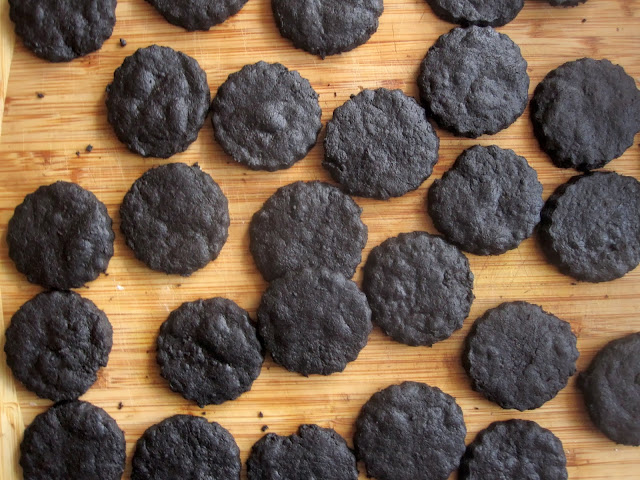
The people at Savory's warned me that it's best to only use this cocoa powder if you have a clear idea as to what exactly you're doing. There's far less fat in this cocoa powder than in the stuff we're all used to, so you'll need to compensate for that if you want any hope of them coming together. Keller's original recipe calls for all black cocoa powder, but I think it'll make your life a bit easier (and the cookies easier to manage) if you use a mixture of cocoa powders. I've indicated so in the recipe below. And the cookies themselves? The classiest Oreo you'll ever eat, with crumbly, chocolatey, barely sweet cookie and a white chocolate ganache that's absolutely spot-on. As always, these are best enjoyed alongside a tall glass of milk.
Oreos (adapted from Thomas Keller's recipe in Bouchon Bakery)
For White Chocolate Ganache:
4 ounces 35% white chocolate, chopped
0.5 ounce salted butter
1/2 cup + 1 teaspoon heavy cream
1/4 cup confectioner's sugar
Chocolate Shortbread
1 3/4 cups + 1 1/2 tablespoons all-purpose flour
3/4 + 1 1/2 tablespoons unsweetened alkalized cocoa powder
1/4 cup regular unsweetened cocoa powder
3/8 teaspoon baking soda
2 sticks salted butter
1 teaspoon Kosher salt
3/4 cup + 1 tablespoon granulated sugar
For the filling: Melt the chocolate and butter together, stirring constantly. Meanwhile, bring the cream to just under a simmer.
Pour the cream over the melted chocolate and whisk to combine. Pour into a container and refrigerate for at least 4 hours, or up to 1 day, until completely chilled.
Meanwhile, for the shortbread: Place the flour in a medium bowl, sift in the cocoas and baking soda, and whisk to combine.
Place the butter in the bowl of a stand mixer fitted with the paddle attachment. Turn to medium-low speed and mix until smooth. Add the salt and mix for another 15 to 30 seconds. Add the sugar and mix for about 2 minutes, until fluffy. Scrape down the sides and bottom of the bowl.
Add the dry ingredients in 2 additions, mixing on low speed for 15 to 30 seconds after each, or until just combined, then mix until the dough begins to come together.
Mound the dough on the work surface and, using the heel of your hand or a pastry scraper, push it together into a 6-inch-square block. Wrap in plastic wrap and refrigerate for at least 1 hour, until firm. (The dough can be refrigerated for up to 2 days or frozen for up to 1 month.)
Position the racks in the upper and lower thirds of the oven and preheat the oven to 325°F (standard). Line two sheet pans with Silpats or parchment paper.
Unwrap the dough and place it between two pieces of parchment paper or plastic wrap. With a rolling pin, pound the top of the dough, working from left to right, to begin to flatten it, then turn the dough 90 degrees and repeat (this will help prevent the dough from cracking as it is rolled). Roll out to a 1/8-inch-thick sheet. I found that as the dough warms up slightly beneath your hands it will be easier to stick together and get to cooperate.
Using a fluted cutter of your preferred size, cut rounds from the dough. If necessary, push the trimmings together, refrigerate until firm, and reroll. (Any trimmings can be baked as is, cooled, and ground in the food processor to use as cookie crumbs over ice cream.) If the dough softens, return to the refrigerator until the cookies are firm enough to transfer to a sheet pan. Arrange the rounds on the sheet pans, leaving about I inch between them. (The dough can be shaped in advance; see Note.)
Bake for 8-10 minutes, turning the pans around halfway through baking, until the cookies are fragrant, with small cracks on the surface. Be careful that they do not burn! If anything starts to smell the slightest bit burny, rescue them immediately. (Because the cookies are so dark, it can be difficult to tell when they are done.) Set the pans on a cooling rack and cool for 5 to 10 minutes, then transfer the cookies to the rack to cool completely.
To assemble the cookies: Scrape the filling into a bowl and add the confectioner's sugar. Beat together (adding more confectioner's sugar) until the filling is relatively stiff. Transfer to the pastry bag.
Turn half of the cookies over. Pipe filling into the center of the cookie, about the size of a half-dollar coin. Top each with a second cookie and press gently to sandwich the cookies.
The cookies are best after they've completely cooled or been chilled in the refrigerator. Keep refrigerated if filled, for up to 3 days. Enjoy!
Subscribe to:
Post Comments (Atom)


No comments:
Post a Comment